Two Fun and Easy DIY Holiday Crafts for the Whole Family
It’s the most wonderful time of the year…
December is here, and with holidays like Hanukkah, Christmas, Kwanzaa and New Year’s Eve just around the corner, now is the perfect time to cozy up with a mug of something warm and get crafting! Kids and grown-ups can work together to follow the instructions and safely and easily create these crafts out of materials already in the home. Hint: They make wonderful gifts that friends, family, caregivers, teachers, or neighbors are sure to treasure for years to come.
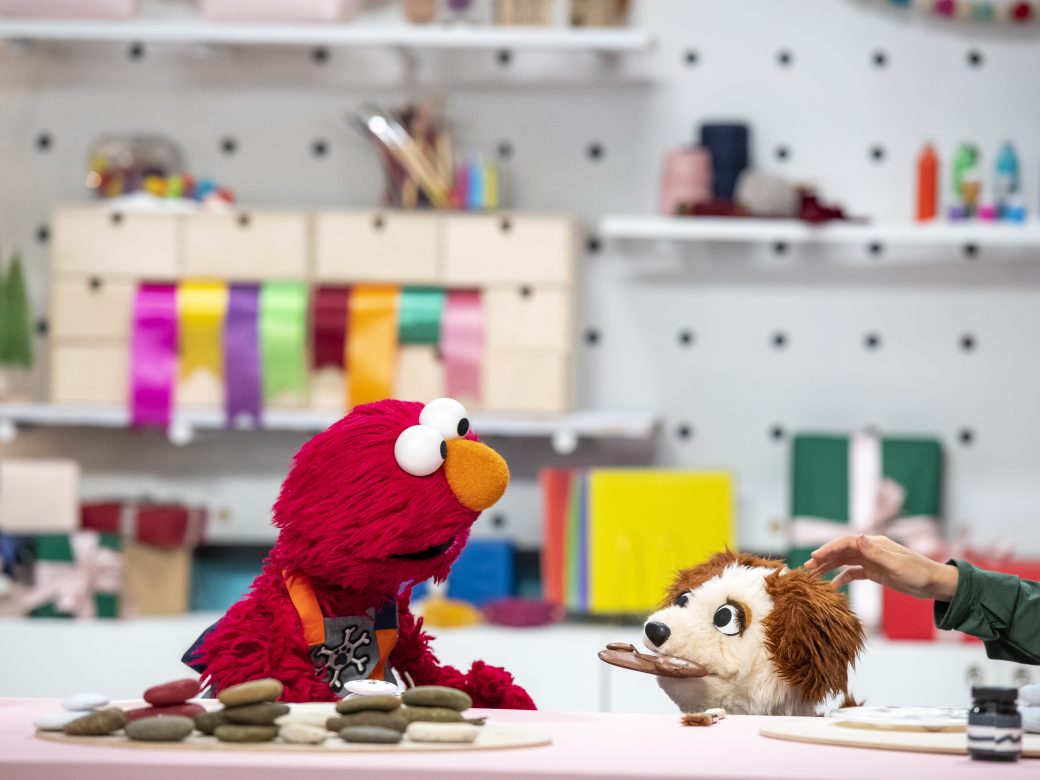
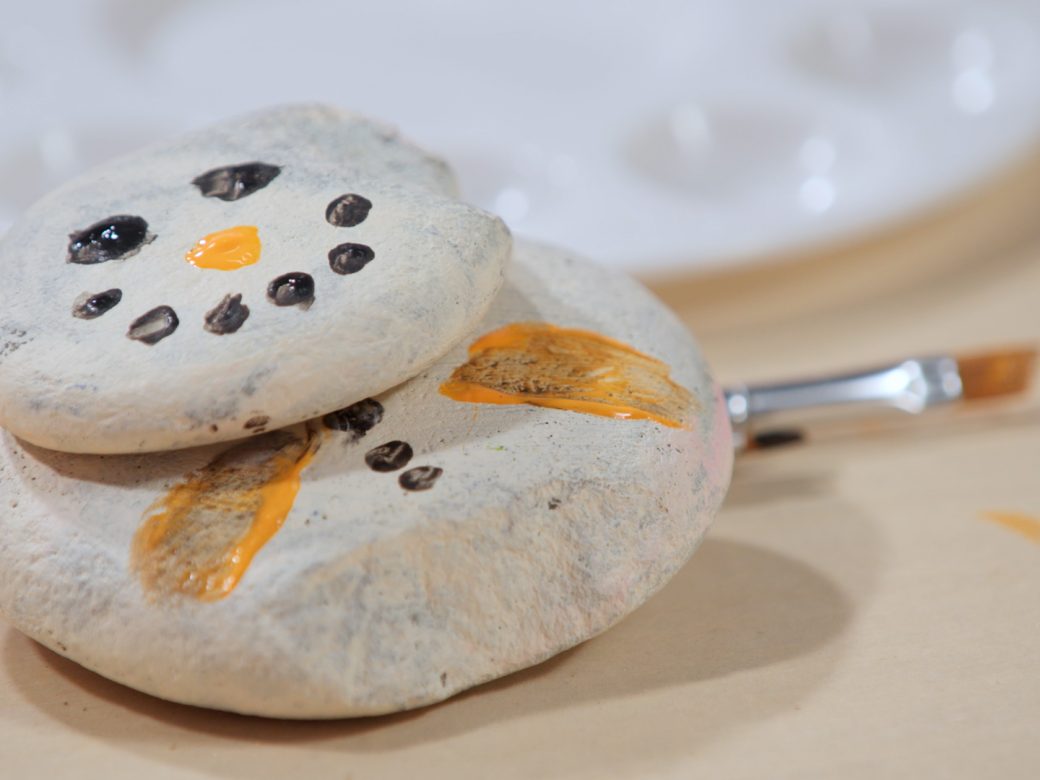
1. Seasonal Paperweights
1. Seasonal Paperweights
Add some holiday cheer to your workspace this season with two adorable DIY paperweight designs: A snowman and a reindeer!
Snowman Paperweight:
![]() You’ll need:
You’ll need:
- Two smooth, flat, circular rocks: One medium (about two inches in diameter) and one large (three or four inches)
- Paint: White, black, orange, and brown
- Paint brushes: Various sizes
- Craft glue
Steps:
- Using a large paintbrush, cover both rocks completely in white paint. Let dry.
- Using craft glue, glue the smaller rock on top of the bigger rock. Let dry.
- Using black paint and a small paintbrush, paint eyes and a mouth on to the top rock, and buttons onto the bottom rock. Let dry.
- Using orange paint and a small paintbrush, paint a carrot nose on the top rock between the eyes and mouth. Let dry.
- Using brown paint and a small paintbrush, paint stick arms on the bottom rock. Let dry.
- Optional: Use a toothpick and white paint to put tiny dots (pupils) in the center of the eyes. Let dry.
- Place on top of a stack of papers and enjoy!
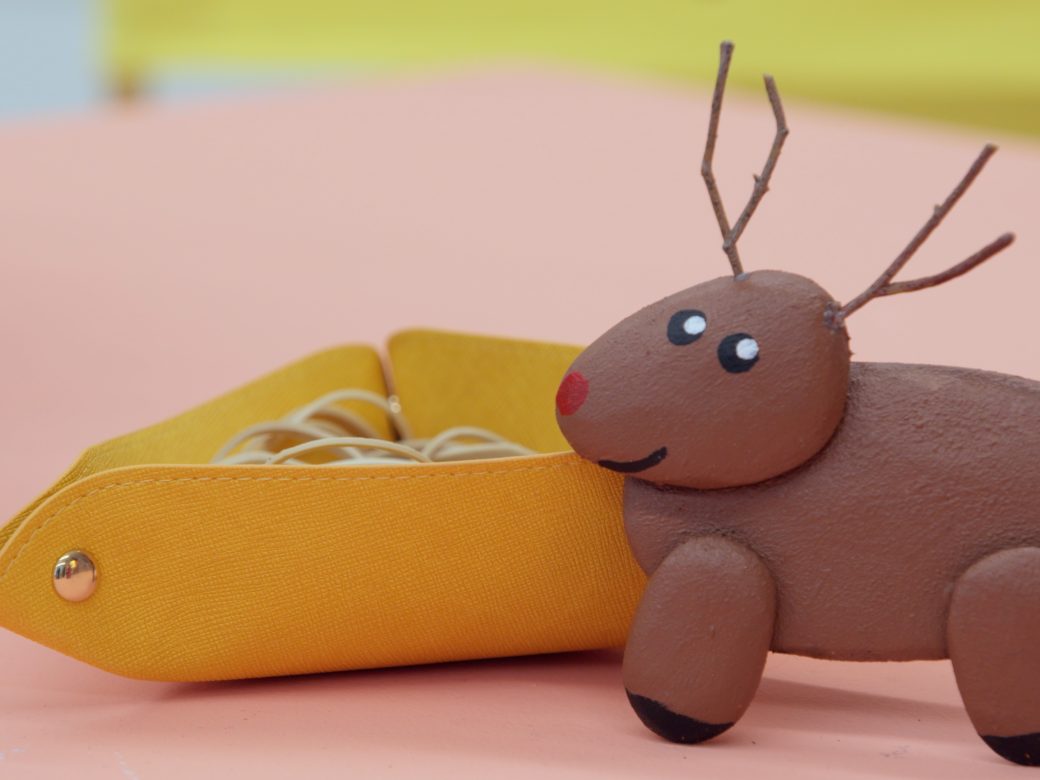
Rudolph the Reindeer Paperweight:
![]() You’ll need:
You’ll need:
- Four smooth, flat, oval rocks: Two small (one inch in diameter), one medium (two to three inches) and one large (three-four inches)
- Paint: Brown, black, white, and red
- Paint brushes: Various sizes
- Craft glue
- Two small brown twigs, sticks, or painted toothpicks
Steps:
- Using a large paintbrush, cover all four rocks completely in brown paint. Let dry.
- Lay the largest rock down horizontally (so that it is longer than it is tall). This will be Rudolph’s body. Let dry.
- Using craft glue, attach the medium rock horizontally to the top right corner of the body. This will be Rudolph’s head. Let dry.
- Using craft glue, attach the two small rocks vertically (so that they are taller than they are long) to the bottom of Rudolph’s body, one on the left and one on the right. These will be Rudolph’s front and hind legs. Let dry.
- Using black paint and a small paintbrush, paint eyes and a mouth on the head, feet on the bottom of each leg, and a tail on the back of the body. Let dry.
- Using red paint and a small paintbrush, paint a nose on the front of the face. Let dry.
- Using craft glue, attach the sticks to the top of the head to make antlers. Hold in place until they dry.
- Optional: Use a toothpick and white paint to put tiny dots (pupils) in the center of the eyes. Let dry.
- Place on top of a stack of papers and enjoy!
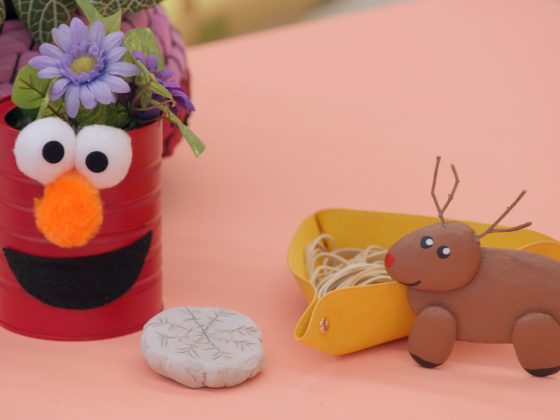
2. Sesame Planters
2. Sesame Planters
Create your very own Elmo and Tango-themed planters so that your indoor garden can bloom all year round.
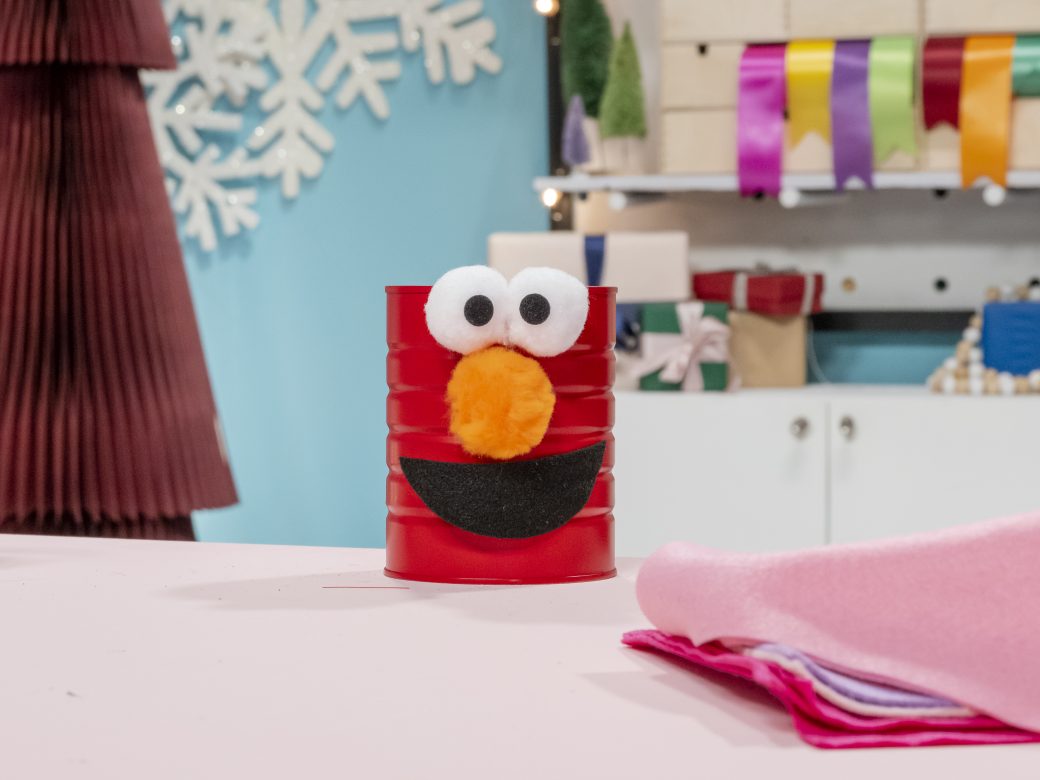
Elmo Planter:
![]() You’ll need:
You’ll need:
- One large, clean aluminum can (Optional: Have a grown-up safely cut or drill a hole through the bottom for drainage.)
- Red paint
- A paintbrush
- Three pompoms or cotton balls: Two white and one (painted) orange
- Black felt
- Craft glue
- Scissors (ask a grown-up for help!)
Steps:
- Paint the entire can red. Let dry.
- Cut the black felt into a half-moon/crescent shape. This will be Elmo’s mouth.
- Using the remaining felt, cut two small circles the size of marbles. These will be Elmo’s pupils.
- Glue Elmo’s pupils onto the white cotton balls or pompoms. Let dry. These will be Elmo’s eyes.
- Glue Elmo’s mouth between the center and the bottom of the can. Let dry.
- Glue the orange pompom or painted cotton ball into the center of the can, above the mouth. This will be Elmo’s nose. Let dry.
- Glue Elmo’s eyes onto the top of the can, above the orange pompom. Let dry.
- Add fresh-picked flowers and water to your new planter or ask for a grown-up’s help to add soil and seeds, and watch your very own flowers grow.
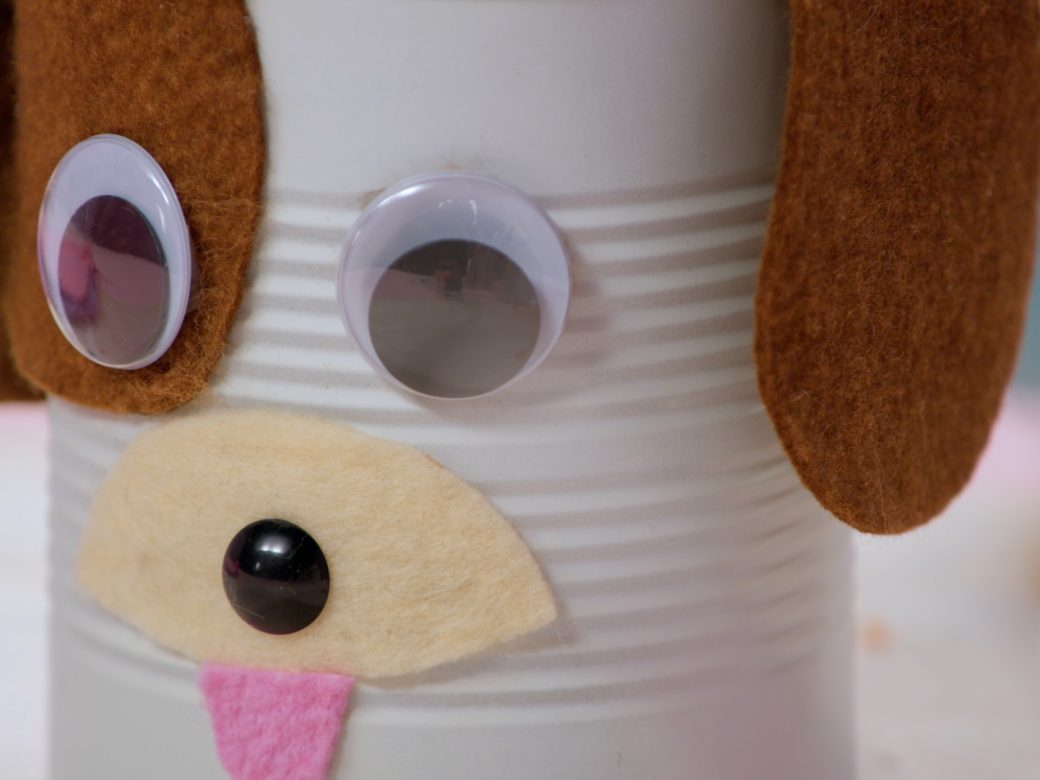
Tango Planter:
![]() You’ll need:
You’ll need:
- One large, clean aluminum can (Optional: Have a grown-up safely cut or drill a hole through the bottom for drainage.)
- White paint
- A paintbrush
- Felt: brown, tan, and light pink
- A black button
- Craft glue
- Two medium sized googly-eyes
- Scissors (ask a grown-up for help!)
- Paint the entire can white. Let dry.
- Cut the brown felt into three pieces: One large semi-circle for Tango’s eye patch, and two large teardrop shapes for her cute, floppy ears.
- Cut the tan felt into a small semi-circle. This will be Tango’s snout.
- Cut the pink felt into an even smaller half-oval. This will be Tango’s tongue.
- Using craft glue, attach Tango’s eye patch to the top left side of the can, and her ears to the sides of it. Let dry.
- Using craft glue, attach Tango’s snout and tongue to the center of the can. Let dry.
- Using craft glue, attach the google eyes to the can, one in the brown patch and one a few inches from it in the white paint. Let dry.
- Glue the button to the center of the tan felt to make Tango’s adorable nose. Let dry.
- Add fresh-picked flowers and water to your new planter or ask for a grown-up’s help to add soil and seeds and watch your very own flowers grow.